Let's get your machine working.
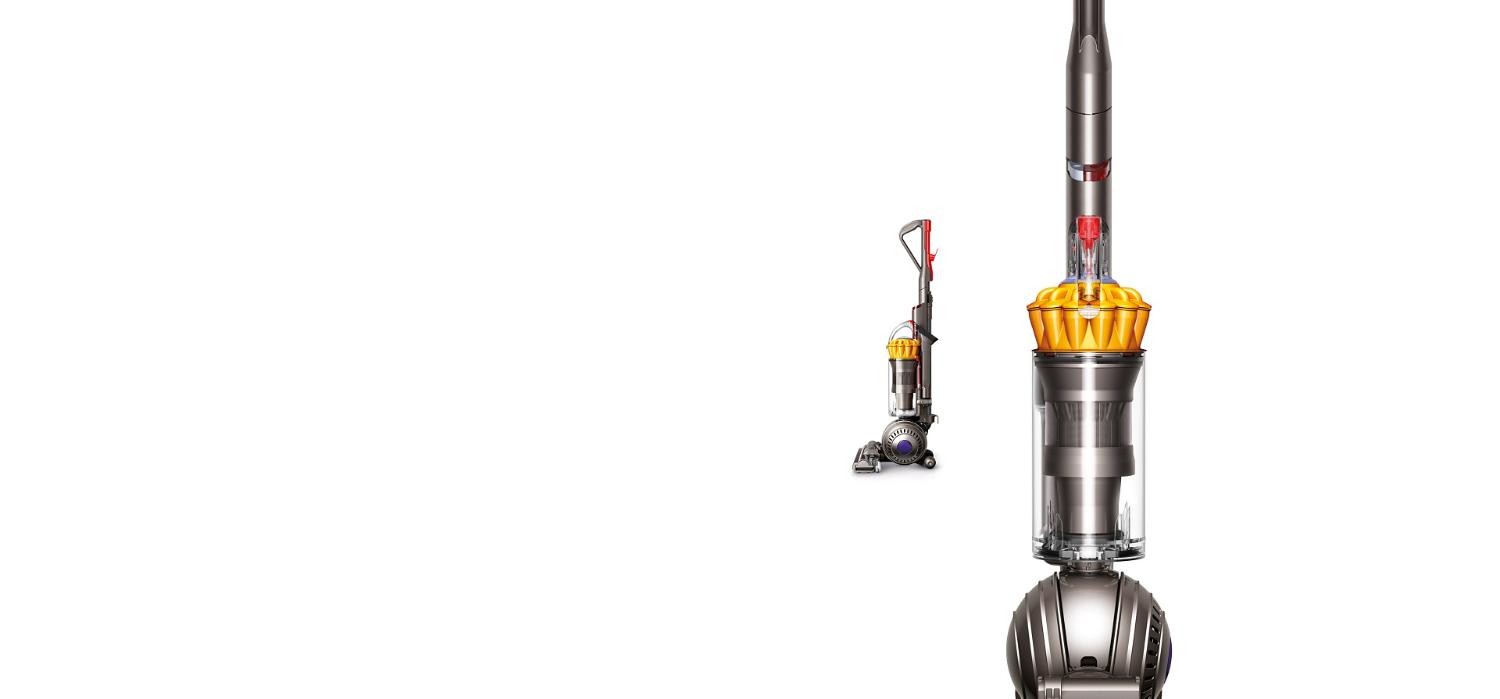
DC40 Multi Floor vacuum (Iron/Bright Silver/Non-Metallic Yellow)-
DC40/DC42
-
Cleaning the bin and cyclone
-
More help required
-
Troubleshooting
-
Pick up issues
-
Check the base
-
Check inlet suction
-
Suction weaker than usual
-
Issue resolved
-
Check bin and cyclone
-
Wash the filters
-
Issue not resolved, please speak to our Customer Support Team
-
Issue not resolved, please speak to our Customer Support Team
-
Reset the Brush bar
-
Has performance improved?
-
Check the inlet suction
-
Intermittent spinning
-
Issue not resolved, please speak to our Customer Support Team
-
Clear the Cleaner head - step by step
-
Check Cleaner head
-
Issue not resolved, please speak to our Customer Support Team
-
Issue not resolved, please speak to our Customer Support Team
-
Hose and Wand
-
Check the hose
-
Check the hose - step by step
-
The hose has split
-
Replacement part required
-
Replacement part required
-
Check the Wand
-
Replacement part required
-
Check both base and hose
-
Power or electrical issue
-
No power
-
Less than two hours
-
Issue not resolved
-
Check for blockages
-
Washing the filters
-
Washing the filters - step by step
-
Issue resolved
-
More than two hours
-
The Brush bar is not spinning on the floor tool
-
Check the Cleaner head - step by step
-
Issue not resolved, please speak to our Customer Support Team
-
Intermittent power
-
Washing the filters
-
Power cable is damaged
-
Switch not working
-
Issue not resolved, please speak to our Customer Support Team
-
Unusual smell
-
Damp or musty
-
Issue not resolved, please speak to our Customer Support Team
-
Visible issue
-
Issue not resolved, please speak to our Customer Support Team
-
Intermittent spinning
-
Cleaner head falling off
-
Issue not resolved, please speak to our Customer Support Team
-
Issue not resolved, please speak to our Customer Support Team
-
Base jammed
-
Replacement part required
-
Ball shell has come off
-
Filter side
-
Refit the ball shell
-
Issue not resolved, please speak to our Customer Support Team
-
Issue not resolved, please speak to our Customer Support Team
-
Replacement part required
-
Issue not resolved, please speak to our Customer Support Team
-
Machine is hard to push
-
Reset the Brush bar
-
Replacement part required
-
Brush bar spinning, check the soleplate
-
Replacement part required
-
Issue not resolved, please speak to our Customer Support Team
-
The hose has split
-
Replacement part required
-
Replacement part required
-
Replacement part required
-
Sparks or smoke
-
Issue not resolved, please speak to our Customer Support Team
-
Issue not resolved, please speak to our Customer Support Team
-
Machine spitting out dust
-
Stabiliser issue
-
Check for blockages
-
Check duct and internal hose
-
Reassemble and test
-
Issue not resolved, please speak to our Customer Support Team
-
Replacement part required
-
Check hose and duct
-
Reset the Brush bar
-
Check the Brush bar
-
Check bristles
-
Unusual noise
-
The ball clicks
-
Refit the post-filter
-
Issue not resolved, please speak to our Customer Support Team
-
Turn off the Brush bar
-
Clear the Cleaner head
-
Cleaner head cleared
-
Issue not resolved, please speak to our Customer Support Team
-
Issue not resolved, please speak to our Customer Support Team
-
Loud noise with no power
-
Check for blockages
-
High pitched whistle
-
Remove the post-filter
-
Issue not resolved, please speak to our Customer Support Team
-
Refit the post-filter
-
How to turn the Brush bar on and off
-
How to carry your Dyson machine
-
How to start vacuuming
-
Important safety instructions
-
How to assemble your Dyson machine
-
Emptying the bin
-
Popular queries
We're glad the problem's been solved.
Please let us know if there's anything else we can help you with.
We need a little more information to help us solve your issue.
But our Customer Support Team will be able to solve your problem.
Please contact our customer service team on 0800 298 0298, or directly on Live Chat through our Digital Assistant by clicking the purple icon at the bottom of the page. You can start a conversation with an Expert by clicking the agent icon at the bottom left of the chat window.
You might need a replacement part.
It looks like the Hose is not working. You can solve this by ordering a new one below.
Hose
Part no. 920765-04
Replacement hose for your Dyson vacuum cleaner.
£37.50

Hose
Part no. 920765-04
Replacement hose for your Dyson vacuum cleaner.
£37.50
£37.50
You might need a replacement part.
It looks like the Hose is not working. You can solve this by ordering a new one below.
Hose
Part no. 920765-04
Replacement hose for your Dyson vacuum cleaner.
£37.50
Hose
Part no. 920765-04
Replacement hose for your Dyson vacuum cleaner.
£37.50
£37.50
You might need a replacement part.
It looks like the Wand is not working. You can solve this by ordering a new one below.
Wand
Part no. 923523-01
Replacement wand for your Dyson vacuum cleaner.
£27.50

Wand
Part no. 923523-01
Replacement wand for your Dyson vacuum cleaner.
£27.50
£27.50
We need a little more information to help us solve your issue.
Please contact our customer service team on 0800 298 0298, or directly on Live Chat through our Digital Assistant by clicking the purple icon at the bottom of the page. You can start a conversation with an Expert by clicking the agent icon at the bottom left of the chat window.
We're glad the problem's been solved.
Please let us know if there's anything else we can help you with.
We need a little more information to help us solve your issue.
But our Customer Support Team will be able to solve your problem.
Please contact our customer service team on 0800 298 0298, or directly on Live Chat through our Digital Assistant by clicking the purple icon at the bottom of the page. You can start a conversation with an Expert by clicking the agent icon at the bottom left of the chat window.
We need a little more information to help us solve your issue.
But our Customer Support Team will be able to solve your problem.
Please contact our customer service team on 0800 298 0298, or directly on Live Chat through our Digital Assistant by clicking the purple icon at the bottom of the page. You can start a conversation with an Expert by clicking the agent icon at the bottom left of the chat window.
We need a little more information to help us solve your issue.
But our Customer Support Team will be able to solve your problem.
Please contact our customer service team on 0800 298 0298, or directly on Live Chat through our Digital Assistant by clicking the purple icon at the bottom of the page. You can start a conversation with an Expert by clicking the agent icon at the bottom left of the chat window.
We need a little more information to help us solve your issue.
But our Customer Support Team will be able to solve your problem.
Please contact our customer service team on 0800 298 0298, or directly on Live Chat through our Digital Assistant by clicking the purple icon at the bottom of the page. You can start a conversation with an Expert by clicking the agent icon at the bottom left of the chat window.
We need a little more information to help us solve your issue.
But our Customer Support Team will be able to solve your problem.
Please contact our customer service team on 0800 298 0298, or directly on Live Chat through our Digital Assistant by clicking the purple icon at the bottom of the page. You can start a conversation with an Expert by clicking the agent icon at the bottom left of the chat window.
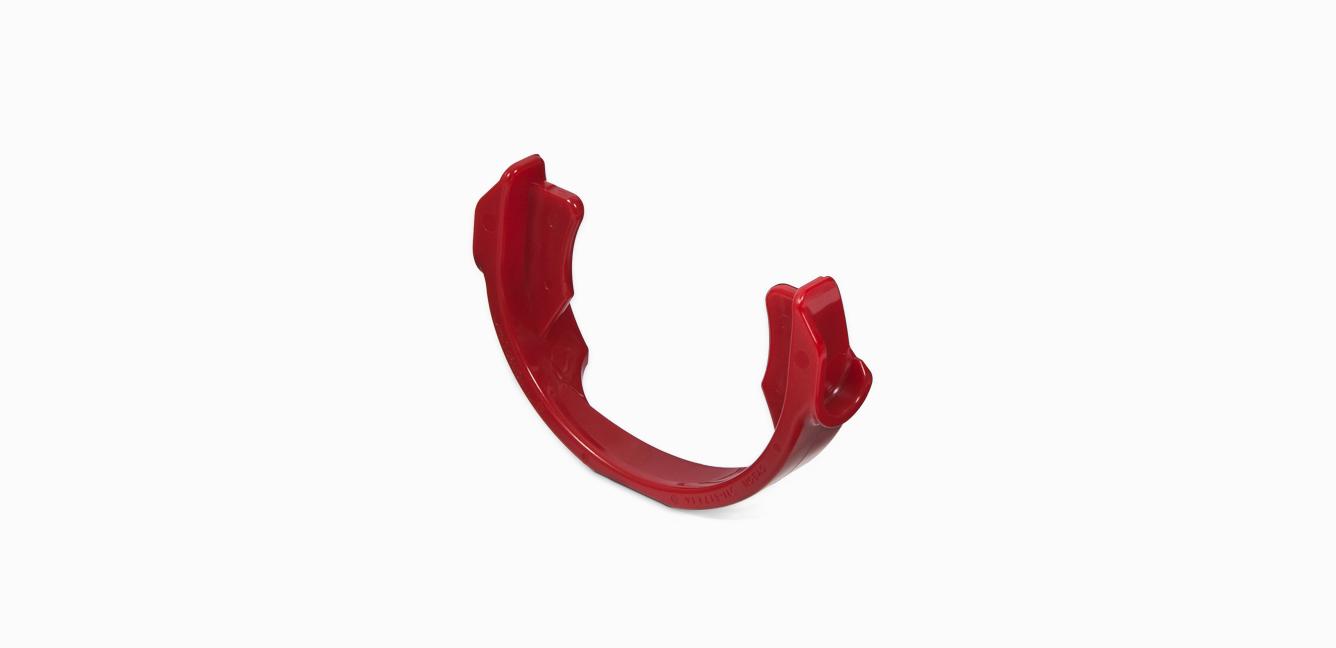
You might need a replacement part.
It looks like the C-clip is not working. You can solve this by ordering a new one below.
C-clip
Part no. 922466-01
Replacement c-clip for your Dyson vacuum cleaner.
£1.50
C-clip
Part no. 922466-01
Replacement c-clip for your Dyson vacuum cleaner.
£1.50
£1.50
We need a little more information to help us solve your issue.
Please contact our customer service team on 0800 298 0298, or directly on Live Chat through our Digital Assistant by clicking the purple icon at the bottom of the page. You can start a conversation with an Expert by clicking the agent icon at the bottom left of the chat window.
We need a little more information to help us solve your issue.
But our Customer Support Team will be able to solve your problem.
Please contact our customer service team on 0800 298 0298, or directly on Live Chat through our Digital Assistant by clicking the purple icon at the bottom of the page. You can start a conversation with an Expert by clicking the agent icon at the bottom left of the chat window.
You might need a replacement part.
It looks like the Ball shell filter side is not working. You can solve this by ordering a new one below.
Ball shell filter side
Part no. 924957-02
Replacement ball shell (filter side) for your Dyson vacuum cleaner.
£19.00

Ball shell filter side
Part no. 924957-02
Replacement ball shell (filter side) for your Dyson vacuum cleaner.
£19.00
£19.00
We need a little more information to help us solve your issue.
But our Customer Support Team will be able to solve your problem.
Please contact our customer service team on 0800 298 0298, or directly on Live Chat through our Digital Assistant by clicking the purple icon at the bottom of the page. You can start a conversation with an Expert by clicking the agent icon at the bottom left of the chat window.
We're glad the problem's been solved.
Please let us know if there's anything else we can help you with.
You might need a replacement part.
It looks like the Hose is not working. You can solve this by ordering a new one below.
Hose
Part no. 920765-04
Replacement hose for your Dyson vacuum cleaner.
£37.50
Hose
Part no. 920765-04
Replacement hose for your Dyson vacuum cleaner.
£37.50
£37.50
You might need a replacement part.
It looks like the Hose is not working. You can solve this by ordering a new one below.
Hose
Part no. 920765-04
Replacement hose for your Dyson vacuum cleaner.
£37.50
Hose
Part no. 920765-04
Replacement hose for your Dyson vacuum cleaner.
£37.50
£37.50
You might need a replacement part.
It looks like the Hose is not working. You can solve this by ordering a new one below.
Hose
Part no. 920765-04
Replacement hose for your Dyson vacuum cleaner.
£37.50
Hose
Part no. 920765-04
Replacement hose for your Dyson vacuum cleaner.
£37.50
£37.50
We need a little more information to help us solve your issue.
But our Customer Support Team will be able to solve your problem.
Please contact our customer service team on 0800 298 0298, or directly on Live Chat through our Digital Assistant by clicking the purple icon at the bottom of the page. You can start a conversation with an Expert by clicking the agent icon at the bottom left of the chat window.
Further help
DC40 Multi Floor vacuum (Iron/Bright Silver/Non-Metallic Yellow)